InMoov 3D Printed Arm
I built this arm in collaboration with John Wu, who is currently the CEO of a start-up called 3DMaker Inc. John was previously working at National Instrument (Taiwan Branch) as a technical manager. We published a book together couple years ago entitled Handbook of LabVIEW Programming: Build Your Own Intelligent Robots. Since he knew that I am an experienced LabVIEW programmer, he asked me to help him with the InMoov 3D printed arm project. He wanted to exhibit this arm at Maker Faire Taiwan 2013 in order to showcase the capability of 3D printers. InMoov is an open source project of a bio-mimetic humanoid robot whose assembly sketches can be downloaded on Thingiverse. We constructed the arm based on the original design but with some modifications, and I extended the functionality of the robot for different tasks. This arm has three modes of operation: FreeDemo, RomoteControl, and PaperScissorsStone.
Construction of the Arm
Most of the components of this arm were made by a 3D printer (Afinia H-Series) except the bottom container which was made from acrylic sheets. The bottom container has an Arduino Mega 2560 board, an AC-to- DC power supply, and a custom-made prototyping shield, as shown in Fig. 1. The prototyping shield was made in cooperation with Aroboto Studio. This made it easier for servo motors to connect with Arduino and allowed them be powered by the AC-to-DC power supply, since the current from Arduino was insufficient to drive all of the servo motors we used.
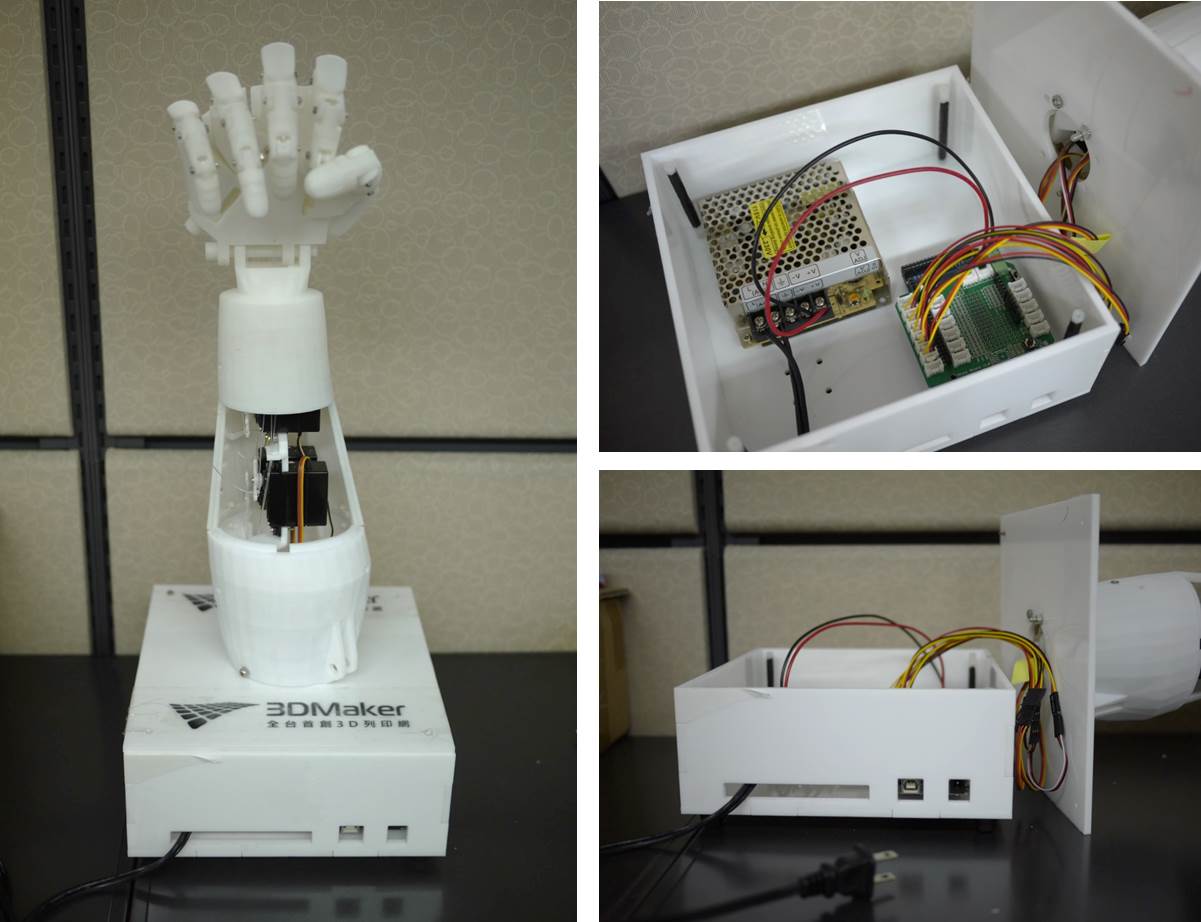
Fig. 1 The bottom container holds an Arduino Mega 2560 board, an AC-to- DC power supply, and a custom-made prototyping shield.
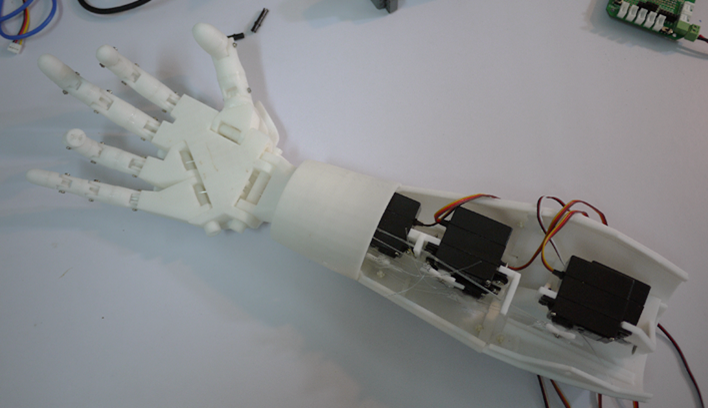
This arm uses five servo motors to control each finger. We tied two fishing lines to the servo arm of every servo motors so that a single servo motor could make a finger to perform flexion and extension, as shown in Fig. 2.

Fig. 2 We tied two fishing lines to each servo motor so that the fingers could perform flexion and extension.
FreeDemo Mode
I developed the program for the arm using LabVIEW 2011. As mentioned, the program has three modes of operations: FreeDemo, RemoteControl, and PaperScissorStone. The complete user interface of the program is shown in Fig. 3 as slideshow images. The program will show the main window when it starts; I can choose which operation to perform in the main window, and the corresponding window will pop out.


Fig. 3 The user interface of the program. When the program is started, it will only show the main window, and the user can choose which operation to perform from the main window, and the corresponding window will pop out.
In FreeDemo mode, the arm just repeatedly performs fixed patterns of motion, therefore, the program is very simple. I prepared this operation mode in case I am not close enough to the robot arm to give instructions.
RemoteControl Mode
For the RemoteControl mode, I designed a "MagicGlove" to control the robot arm (Fig. 4). In order to measure finger motions, I used five dFlex flex sensors, which were made by Dextor Industries. The dFlex flex sensors are variable resistors which are very easy to use. I used LEGO MINDSTORM NXT to read data from the sensors, and then transmit the data to a PC via Bluetooth. However, since NXT only has four input ports, I used a sensor multiplexer from HiTechnic to provide additional sensor ports. I chose dFlex, NXT and the sensor multiplexer because I already had them for years, and therefore didn't need to buy additional parts.

Fig. 4 I design a "MagicGlove" to control the robot arm remotely.
The programming of RemoteControl mode is also pretty easy. Since LabVIEW supports Bluetooth connections with NXT, I could easily establish the Bluetooth connection between NXT and the PC. Once the program is started, it will ask the user to enter the name of the NXT in order to make a Bluetooth connection. After the connection is made, the NXT will keep sending data back to the PC, and the program will match the data to the rotation angle of servo motors.
Here is a video demonstration of the RemoteControl mode:
PaperScissorsStone Mode
In PaperScissorsStone mode, the robot arm can literally "play" paper, scissors, and stone. I used a webcam (Logitech C920) to capture the hand gestures of a person, while the robot arm makes paper, scissor, or stone simultaneously in random fashion. The robot uses a computer voice (recorded from Google Translate) to guide participants to play the game.
I used edge detection to count the number of fingers in order to distinguish between different hand gestures. I believe using edge detection will be more adaptive to different situations such as slightly tilting or shaking hands. However, before performing edge detection, the raw image captured from the webcam needed image pre-processing (Fig. 5). The procedures are as follows:
1. Color Plane Extraction: Projects the raw image to HSL plane in order to reject disturbances from luminance variation.
2. Erosion and Dilation: Eliminating small objects in the image.
3. Auto-threshold: Performs auto-threshold (clustering method) in order to look for bright objects.
4. Histogram Equalization: Makes the image look better and ready for edge detection.

Fig. 5 The procedures for image pre-processing.
When I was trying to use edge detection after image pre-processing, I found that knuckles also have edges, thus making it difficult to distinguish between hand gestures. Therefore, the detected fingers should be "long enough" to be considered as a finger rather than a knuckle. I believed this could be done by comparing the detected length of an object with the total length of the palm. As a result, I calculated the linear average of the processed image and used differentiation to separate the palm out, as shown in Fig. 6:

Fig. 6 The palm could be separated out based on the data from linear average.
Finally, the last problem was how to map the analyzed result (number of fingers) to the gestures of the hand. The truth table for this is presented as Table 1:
Table 1: The truth table which maps the analyzed results to hand gestures.

I then used combinational logic to realize this truth table in LabVIEW, as shown in Fig. 7:

Fig. 7 I used combinational logic to map the analyzed results (number of fingers) to hand gesture.
Here is a video demonstration of the hand gesture recognition program in slow motion:
[Download source code for this demo: LabVIEW 2014 | LabVIEW 2011]
And here is a video demonstration of the program in normal speed. You can see that the program can distinguish from different hand gestures even when my hand was shaking, having knuckles to stretch out a little bit, or tilting in different angles.
Finally, here is a video demonstration of the complete PaperScissorsStone mode in operation:
Maker Faire Taiwan
This robot arm achieved great success in Maker Faire Taiwan 2013. People were all fascinated by its design and functionality. It turned out that RemoteControl was the most popular mode, and lots of people asked me to let them try the MagicGlove. I spent plenty of time explaining the theories behind this robot arm to different people. I was really exhausted after the event, but it was totally worth it!
Here are some photos from Maker Faire Taiwan:


Here is a video about a cute little kid. He was lingering around our booth for a long time watching the robot arm. At first, he didn't know that I was manipulating the arm because he was so fascinated by it. He kept making commands to the arm and found it very interesting that the robot arm was always following his commands. Finally, we showed him the truth, and the moment was captured by John:
I've always loved moments like this, when children are amazed by science and technology and want to learn more. After the little boy found out that the robot arm wasn't really obeying his commands, he didn't feel any disappointment. Instead, he came to me to try the hand glove. I believe rather than tough math and theoretical learning, our education should be more like this, first stimulating the interest of students through some hands-on projects, and then gradually teaching the ideas behind them.
Education of science, math, and technologies, should start with something fun and easy.